How to Change Yamaha Lower Unit Oil
May 13, 2017When it comes to powering your boat, Yamaha is definitely a brand that can assure you of high quality and great endurance. However, no matter how tough your boat engine is, there will be times when it requires some serious repair work, especially if you use it frequently.
When you often take the boat on shallow water, usually it’s just a matter of time until you hit something on the bottom and damage the prop. Fortunately, aside from the spare parts you don’t have to spend more money to pay for the mechanic, because to install Yamaha lower unit is actually quite simple.
Note: You can go to our home page section, If you’re looking to buy a new aftermarket lower unit.
So the first thing to do when you want to replace lower unit Yamaha is to remove the prop and turn the throttle into forward position. Next, you should take off the access panel, which is located on the rear top of the out-drive. Continue by removing the bolt holding the trim tab, you can do that by using a 12 mm socket wrench.

Remove the trim tab, and you will find a bolt underneath. Remove the bolt by using a 14 mm socket. Next, use the same socket to remove the bolt that’s located right in front of where the tab was seated.

Next, you need to separate the lower unit from the upper unit. First, release the attachment of the water pump hose and then unscrew the bolts holding the lower and upper units together.

One important thing you should remember when removing those bolts is that you shouldn’t apply too much force if they don’t come off quickly, because they tend to break if you do so. What you can do is to tap them with a hammer a few times and apply PB Blaster. Sometimes bolts are not included when you purchase a new lower unit, so it would be important to keep the old ones in good shape.
Next, turn the shaft counterclockwise, do this until it stops, after that you can shift it into forward position. Grease the driveshaft as well as any obtrusive pins the hose hole of the water pump.

Now you can slide the new lower unit into its place. Usually a new lower unit has alignment pins to help you place the unit on the right spot. When you install lower unit for Yamaha, the splines sometimes don’t quite match up perfectly with the hidden gear of the upper unit. When this happens, just slip on a prop and spin it gently until it finally matches. Tighten all connecting bolts until the unit sits firmly on its place.

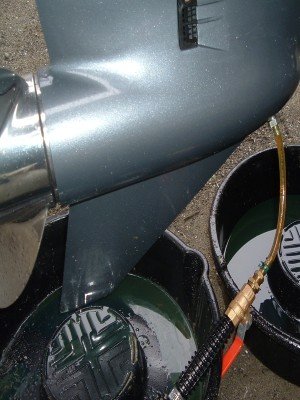
Next, put the trim tab back in its place and don’t forget to the bolt in front of it. Then open the gear case and fill it with lube, you have to remove the lower and upper screws. Use the pump to channel the lube from the bottom, do it until the lube comes out of the upper hole. When you’re done, remove the pump fitting and put the lower screw back in its place.

So that’s how to replace Yamaha lower unit, it’s not difficult at all and definitely will save you time and money rather than taking it to a mechanic.


